Plot Explained Spoilers guaranteed!
Plot Explained

Browse by genre

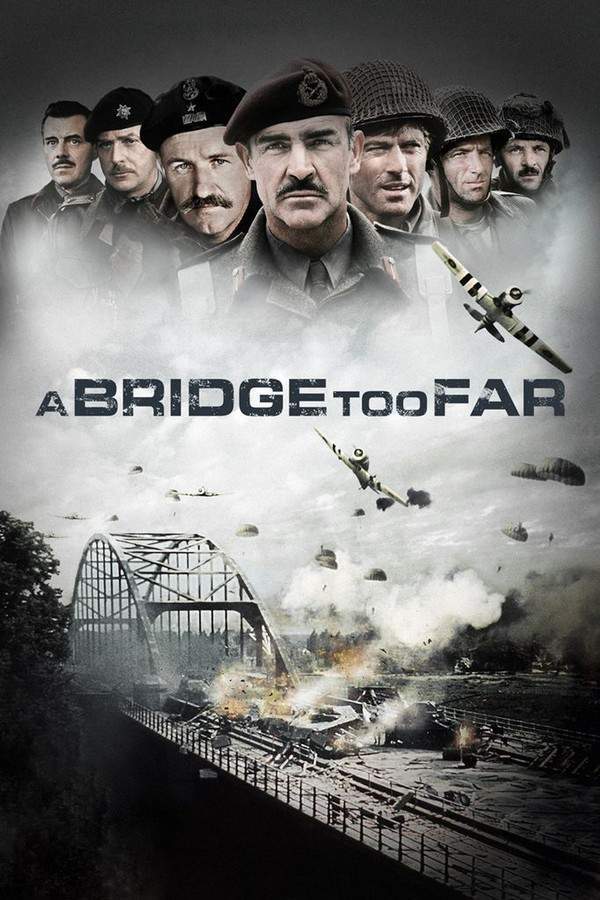
A Bridge Too Far (1977) movie poster

Timeline

A Bridge Too Far (1977) Timeline Explained – Every Event in Order

Release, runtime and language
1977 · 175 min · English
Loading streaming availability…
Directed by
Richard Attenborough
Starring
Sean Connery, Erik van 't Wout, Hans von Borsody, Josephine Peeper, Marlies van Alcmaer, Ryan O'Neal
Budget
$27M

During World War II, as Allied forces gained momentum, a complex and ambitious plan was put into action. British and American airborne troops, led by General Gavin and General Urquhart, launched a daring operation to seize key bridges in the Netherlands. The goal was to swiftly penetrate German lines and open a route into Germany. However, the operation faced unexpected challenges and setbacks, testing the resolve of the Allied forces and highlighting the risks inherent in large-scale military endeavors. The mission's ultimate success remained uncertain amidst the escalating dangers.

On this page (6)
  1. 1 Where to watch
  2. 2 Events in order (14)
  3. 3 Timeline questions answered
  4. 4 Movie threads
  5. 5 Movies like A Bridge Too Far
  6. 6 Every angle
Loading streaming availability…

14 events in order · contains spoilers

A Bridge Too Far Timeline: Events in Chronological Order

Every key event of A Bridge Too Far (1977) in order, scene by scene, with when and where it takes place. Use it to untangle flashbacks, time jumps and parallel storylines, to refresh your memory before the sequel or to find the exact scene you are thinking of.

  1. Operation Market Garden Launch

    The operation begins with the deployment of 35,000 soldiers flown from English airfields. They are dropped behind enemy lines in the Netherlands, tasked with securing vital roads and bridges to facilitate the advance.

    Where
    Netherlands
  2. Planning and Strategy Briefing

    General Urquhart convenes a briefing with his officers, where they discuss their mission objectives. Despite concerns about the long distance to their targets, they underestimate the enemy, believing they will face mainly inexperienced troops.

    Where
    British Headquarters
  3. Reconnaissance Reports Ignored

    Reconnaissance photographs reveal German tanks in Arnhem, raising alarms about the true strength of the enemy. Despite this critical information, General Browning dismisses the reports and fails to act on the warnings from the Dutch underground.

    Where
    Arnhem
  4. Strategic Importance of Arnhem Bridge

    The Arnhem bridge becomes the focal point of the operation, as it is the last escape route for German forces in the Netherlands. Securing this bridge is paramount for advancing into Germany, but the approach is fraught with challenges.

    Where
    Arnhem
  5. Airborne Drops and Initial Resistance

    The airborne troops successfully land with minimal resistance initially, catching the enemy off guard. However, their early successes are marred when the vital Son bridge is destroyed by German forces just before they can secure it.

    Where
    Son
  6. Ambush and Communication Issues

    Progress is hindered as several jeeps face ambushes, and many radio sets malfunction. These setbacks severely impede coordination and support for the advancing troops.

  7. XXX Corps Encounters Obstacles

    The advance of XXX Corps is stalled by German resistance and the narrow road conditions. They must also construct a Bailey bridge to compensate for the destroyed bridge at Son, further delaying their movement.

    Where
    Nijmegen
  8. Daring Nijmegen Bridge Crossing

    Soldiers from the 82nd Airborne Division execute a courageous daylight crossing to secure the Nijmegen bridge. This pivotal action is critical for future operations but delays XXX Corps, who need infantry support for the town capture.

    Where
    Nijmegen
  9. German Forces Tighten Grip

    As the situation deteriorates, German forces tighten their hold on the isolated British paratroopers at the Arnhem bridge. The anticipated reinforcements from Sosabowski's paratroopers arrive too late to turn the tide.

    Where
    Arnhem
  10. Withdrawal Under Heavy Fire

    After several days of intense fighting, the under-equipped British forces, outnumbered and overwhelmed, receive orders to retreat to Oosterbeek. The situation is dire, and Urquhart's men are forced to abandon their positions.

    Where
    Oosterbeek
  11. Urquhart's Narrow Escape

    General Urquhart makes a harrowing retreat with only a fraction of the 10,000 soldiers who initially landed with him. Many of his men are left behind, severely wounded, to facilitate the escape of the remaining forces.

    Where
    Oosterbeek
  12. Confrontation at British Headquarters

    Upon return, Urquhart confronts Browning about the misleading optimism prior to the operation. The tense exchange highlights the contrasting views on the failure and the challenges that plagued the mission.

    Where
    British Headquarters
  13. Life in Oosterbeek's Makeshift Hospital

    In Oosterbeek, Kate ter Horst prepares to leave her home, now a makeshift hospital for wounded British soldiers. As they gather their belongings, the haunting echoes of troops singing 'Abide with Me' resonate through the chaos.

    Where
    Oosterbeek
  14. Final Moments for the Fallen

    The yard of Kate's home becomes a somber resting place for fallen soldiers. Their sacrifice highlights the heavy toll of the operation and the tragic consequences of the battle for Arnhem.

    Where
    Oosterbeek

Last updated: November 16, 2024 at 18:33

Was this helpful?

Timeline questions answered

A Bridge Too Far Timeline Explained: Your Questions Answered

When does it happen, and why in that order? The questions people ask about the chronology of A Bridge Too Far (1977): time jumps, flashbacks, cause and effect between scenes and the correct order of events, each answered with spoilers.

Q1

Why did Allied commanders ignore reconnaissance reports about German tanks at Arnhem?

General Browning dismissed reconnaissance photographs showing German tanks in Arnhem and warnings from the Dutch underground. This critical intelligence error stemmed from overconfidence, the Allied planners believed they would face only inexperienced old men and Hitler Youth troops. The decision to overlook this intelligence proved catastrophic when the British paratroopers landed and encountered formidable SS armored units.

Foreshadowing: Earlier in the briefing, officers expressed astonishment at the long distance from their landing zones to their objectives, hinting at the underestimated challenges ahead.

  • german tanks
  • arnhem
  • intelligence
  • general browning
  • reconnaissance
  • operation market garden
Q2

Why was the Son bridge destroyed before Allied troops could secure it?

The Son bridge was destroyed by German forces just moments before the airborne troops could reach it. Despite catching the enemy largely off guard during the initial drops, the timing was insufficient, German demolition teams managed to detonate the bridge before the Americans could seize it. This forced XXX Corps to construct a Bailey bridge, causing significant delays.

Foreshadowing: The narrow, single-lane approach roads leading to these bridges made rapid movement extremely difficult, giving German forces time to prepare demolitions.

  • son bridge
  • bailey bridge
  • destroyed bridge
  • german demolition
  • xxx corps
  • netherlands
Q3

Why did XXX Corps take so long to advance toward Arnhem?

XXX Corps faced multiple compounding obstacles: German resistance along the single narrow road, the need to construct a Bailey bridge after the Son bridge was destroyed, and waiting for infantry support to capture Nijmegen. The road's constricted width meant vehicles could barely pass, and the 82nd Airborne needed to secure the Nijmegen bridge first through a daring daylight crossing before XXX Corps could proceed.

Foreshadowing: The strategic importance of Nijmegen as a vital crossing point meant the advance could not bypass it.

  • xxx corps
  • nijmegen bridge
  • bailey bridge
  • delay
  • advance
  • allied forces
Q4

Why were the Polish paratroopers delayed and unable to help at Arnhem?

General Sosabowski's Polish brigade was delayed while transport aircraft returned to England after dropping them. By the time they could be reloaded and flown to the Netherlands, the situation at Arnhem had already deteriorated beyond recovery. The delayed reinforcements arrived too late to bolster Urquhart's encircled forces.

Foreshadowing: The operation's complex logistics involving multiple Allied divisions created inherent delays that proved fatal to the mission's timing.

  • polish paratroopers
  • sosabowski
  • delayed reinforcements
  • arnhem
  • british airborne
Q5

Why was capturing the Arnhem bridge so critical to Operation Market Garden?

The Arnhem bridge represented the last escape route for German forces still in the Netherlands and served as a direct corridor into Germany. Securing it would have allowed Allied forces to cross into the German heartland and potentially end the war by Christmas. Its capture was the operation's primary objective.

Foreshadowing: The mission's codename reflected the ambitious goal of crossing multiple bridges to reach this final objective.

  • arnhem bridge
  • strategic objective
  • german escape route
  • germany
  • netherlands
Q6

What caused Operation Market Garden to fail?

The operation failed due to multiple interconnected factors: ignored intelligence about German armor, the destruction of the Son bridge forcing construction delays, the narrow road hampering XXX Corps' advance, and the arrival of reinforcements too late. Combined, these setbacks gave German forces time to surround and overwhelm the isolated British paratroopers at Arnhem.

Foreshadowing: General Urquhart's concerns during the briefing about the long landing distance foreshadowed the logistical nightmares that would plague the mission.

  • operation market garden
  • failure
  • 原因
  • mission failed
  • allied defeat
  • arnhem
Q7

Why was the daylight crossing of the Nijmegen bridge significant?

Soldiers from the 82nd Airborne conducted a daring daylight crossing to secure the Nijmegen bridge, a crucial act that enabled XXX Corps to continue toward Arnhem. This bold action was critical to the operation's limited success but further delayed the advance, as XXX Corps then had to wait for infantry support to capture the town of Nijmegen.

Foreshadowing: The choice to attempt a dangerous daylight operation reflected the desperate need to maintain momentum despite mounting casualties.

  • nijmegen bridge
  • daylight crossing
  • 82nd airborne
  • xxx corps
  • brave crossing
Q8

What happened to Kate ter Horst's home during the battle?

Kate ter Horst's home was transformed into a makeshift hospital for wounded British soldiers. As the battle raged, she gathered her children and an elderly doctor, loading a few belongings into a cart to flee the ruins. The yard became a final resting place for fallen soldiers, while inside, wounded troops sang "Abide with Me" as they awaited capture.

Foreshadowing: The human cost of the operation was personalized through this civilian perspective, foreshadowing the tragic ending.

  • kate terhorst
  • home
  • hospital
  • wounded soldiers
  • abide with me
  • civilians
  • osterbeek
Q9

How many soldiers survived the British retreat from Arnhem?

General Urquhart escaped with fewer than 2,000 soldiers, about one-fifth of the original 10,000 who landed with him. Many severely wounded men were left behind to enable the withdrawal of those still capable of fighting. The majority of the British paratroopers were killed, wounded, or captured.

Foreshadowing: The narrative's steady buildup of setbacks and casualties directly led to this devastating outcome.

  • casualties
  • survivors
  • retreat
  • arnhem
  • 10
  • 000 soldiers
  • killed
  • wounded
  • captured
Q10

Why was the narrow road such a problem for the Allied advance?

The approach to Arnhem required navigating a narrow, single-lane road connecting the bridges at Son and Nijmegen. Vehicles had to squeeze alongside the verge to pass, and the elevated nature of the road made all movement highly conspicuous. This terrain bottleneck severely restricted the flow of XXX Corps' vehicles and made them vulnerable to German attacks.

Foreshadowing: This geographical constraint was visible from the planning stage but its full impact was underestimated.

  • narrow road
  • single lane road
  • terrain
  • bottleneck
  • xxx corps
  • netherlands
  • advance
Q11

Why were there German tanks and elite troops at Arnhem?

Arnhem had become a staging area for German reinforcements and armor retreating from other fronts. The area housed SS infantry and armored units that had been repositioned. This presence, visible in reconnaissance photographs that were ignored, made Arnhem far more heavily defended than Allied planners anticipated.

Foreshadowing: The dismissive attitude toward potential resistance at the briefing set the stage for this catastrophic underestimation.

  • german tanks
  • ss troops
  • arnhem
  • elite forces
  • armored units
  • enemy strength
Q12

What was the Bailey bridge and why was it needed?

The Bailey bridge was a portable, pre-fabricated temporary bridge the Allies used to replace destroyed infrastructure. After the Germans demolished the Son bridge, XXX Corps had to construct a Bailey bridge to cross the gap. This emergency construction work consumed precious time and slowed the entire Allied advance toward Arnhem.

Foreshadowing: The need for field engineering solutions highlighted the improvised nature of the response to German demolitions.

  • bailey bridge
  • temporary bridge
  • son
  • construction
  • engineering
  • xxx corps

Movie threads

More Movies Like A Bridge Too Far, by Mood & Story

Curated lists built around what makes A Bridge Too Far tick: the same mood, the same kind of story or the same emotional payoff. Each list explains why these movies belong together.

Bleak War Epics of Strategic Failure like A Bridge Too Far

Large-scale military operations unravel under the crushing weight of reality. If you appreciated the tragic scale and grim determination of A Bridge Too Far, this section gathers movies that detail monumental military operations facing catastrophic failure. These films share a heavy emotional weight, steady pacing to build inevitable doom, and a deeply somber tone, perfect for viewers seeking similar stories of courage overshadowed by strategic collapse.

  • grim
  • tragic
  • somber
  • tense
  • desperate
  • melancholic
  • Tone: bleak, tragic, grim
  • Pacing: steady, methodical
Why these movies?

The story pattern: The narrative pattern follows a grand plan—often based on historical events—that is executed with initial confidence. However, unforeseen obstacles, hubris, or sheer bad luck cause the operation to falter systematically. The story methodically charts the chain of setbacks, shifting focus from tactical objectives to the sheer struggle for survival and the human cost of failure.

Why they belong together: These movies are grouped by their shared commitment to portraying the bleak side of warfare, where victory is not guaranteed. They resonate through a high-intensity, emotionally heavy atmosphere, a steady pacing that creates a sense of inevitable tragedy, and a narrative structure centered on the collapse of a major undertaking.

Movies with a Methodical Descent into Inevitable Doom like A Bridge Too Far

Stories where a steady, unflinching pace builds towards a tragic and unavoidable conclusion. For viewers who were captivated by the steady, grim progression of A Bridge Too Far, this section finds films that share a similar narrative rhythm. These movies use a methodical pace to build tension and a powerful sense of fate, leading to somber or tragic endings. They are perfect for those who appreciate stories where dread accumulates slowly but surely.

  • tense
  • grim
  • somber
  • melancholic
  • desperate
  • anxious
  • Tone: bleak, tense, somber
  • Pacing: steady, deliberate, slow burn
Why these movies?

The story pattern: The narrative unfolds not with sudden shocks, but with a series of compounding setbacks and logical consequences. The pacing is steady, allowing the audience to fully grasp each new complication and the diminishing chances of success. This creates a powerful emotional journey centered on acceptance of a grim fate rather than a fight against it.

Why they belong together: These films are connected by their unique pacing and tone. The steady rhythm prevents the story from becoming purely action-oriented, instead focusing on the psychological weight of the situation. The shared experience is one of solemn observation as characters march towards a conclusion that feels predetermined by the circumstances.

If you liked this

Movies Like A Bridge Too Far

Similar movies to A Bridge Too Far: the same genre, themes or kind of story. Each one comes with its own plot summary, timeline and ending explained.

Browse all movie summaries

Every angle

A Bridge Too Far (1977) Explained: Plot, Timeline & Characters

Everything about A Bridge Too Far in one place: what happens in the plot summary, the timeline in chronological order, the characters and meaning and a spoiler-free summary. What's After the Movie adds the cast, box office and post-credit scenes.

Coming soon on iOS and Android

The Plot Explained Movie Summary App

Plot summaries, endings explained and timelines on your phone. Catch up on any movie in minutes, save your favorites and never miss a twist again.

Be the first to know when we launch. Your email stays private, always.

Learn more about the app